Screen recording on iOS devices is a convenient feature that lets you capture everything happening on your screen. This article provides a straightforward guide to help you record your screen (with sound) on your iPhone or iPad.
Using iPhone’s Built-in Screen Recording
The easiest way to record your iPhone screen is by using the built-in screen recording feature available on iOS devices. Here’s how:
This guide was created using iOS 18.
1. Unlock your iPhone and swipe down from the top-right corner of your screen.
2. Tap the plus (+) sign in the top-left corner of your screen.
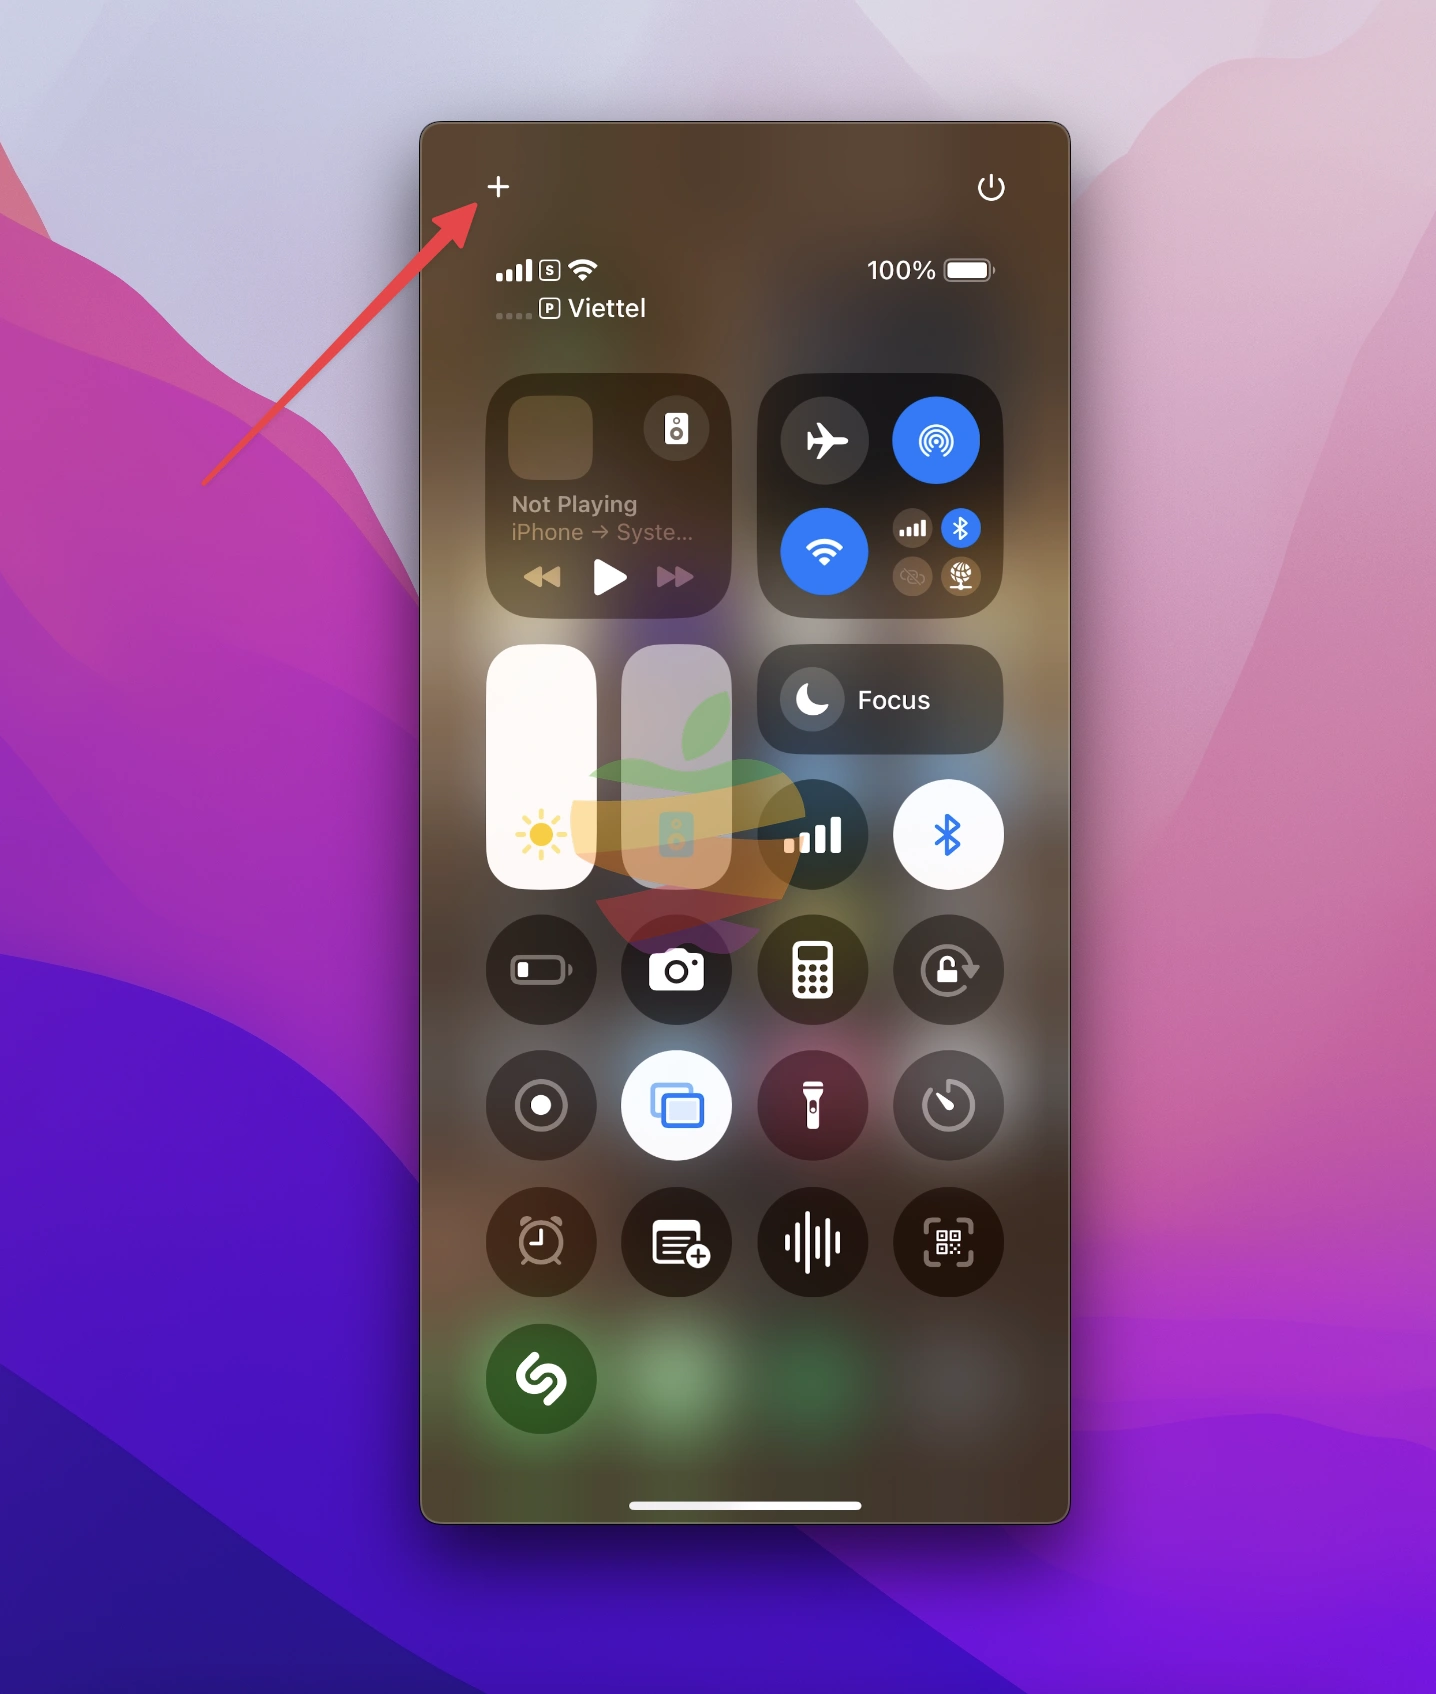
3. Select Add a Control near the bottom of your screen.
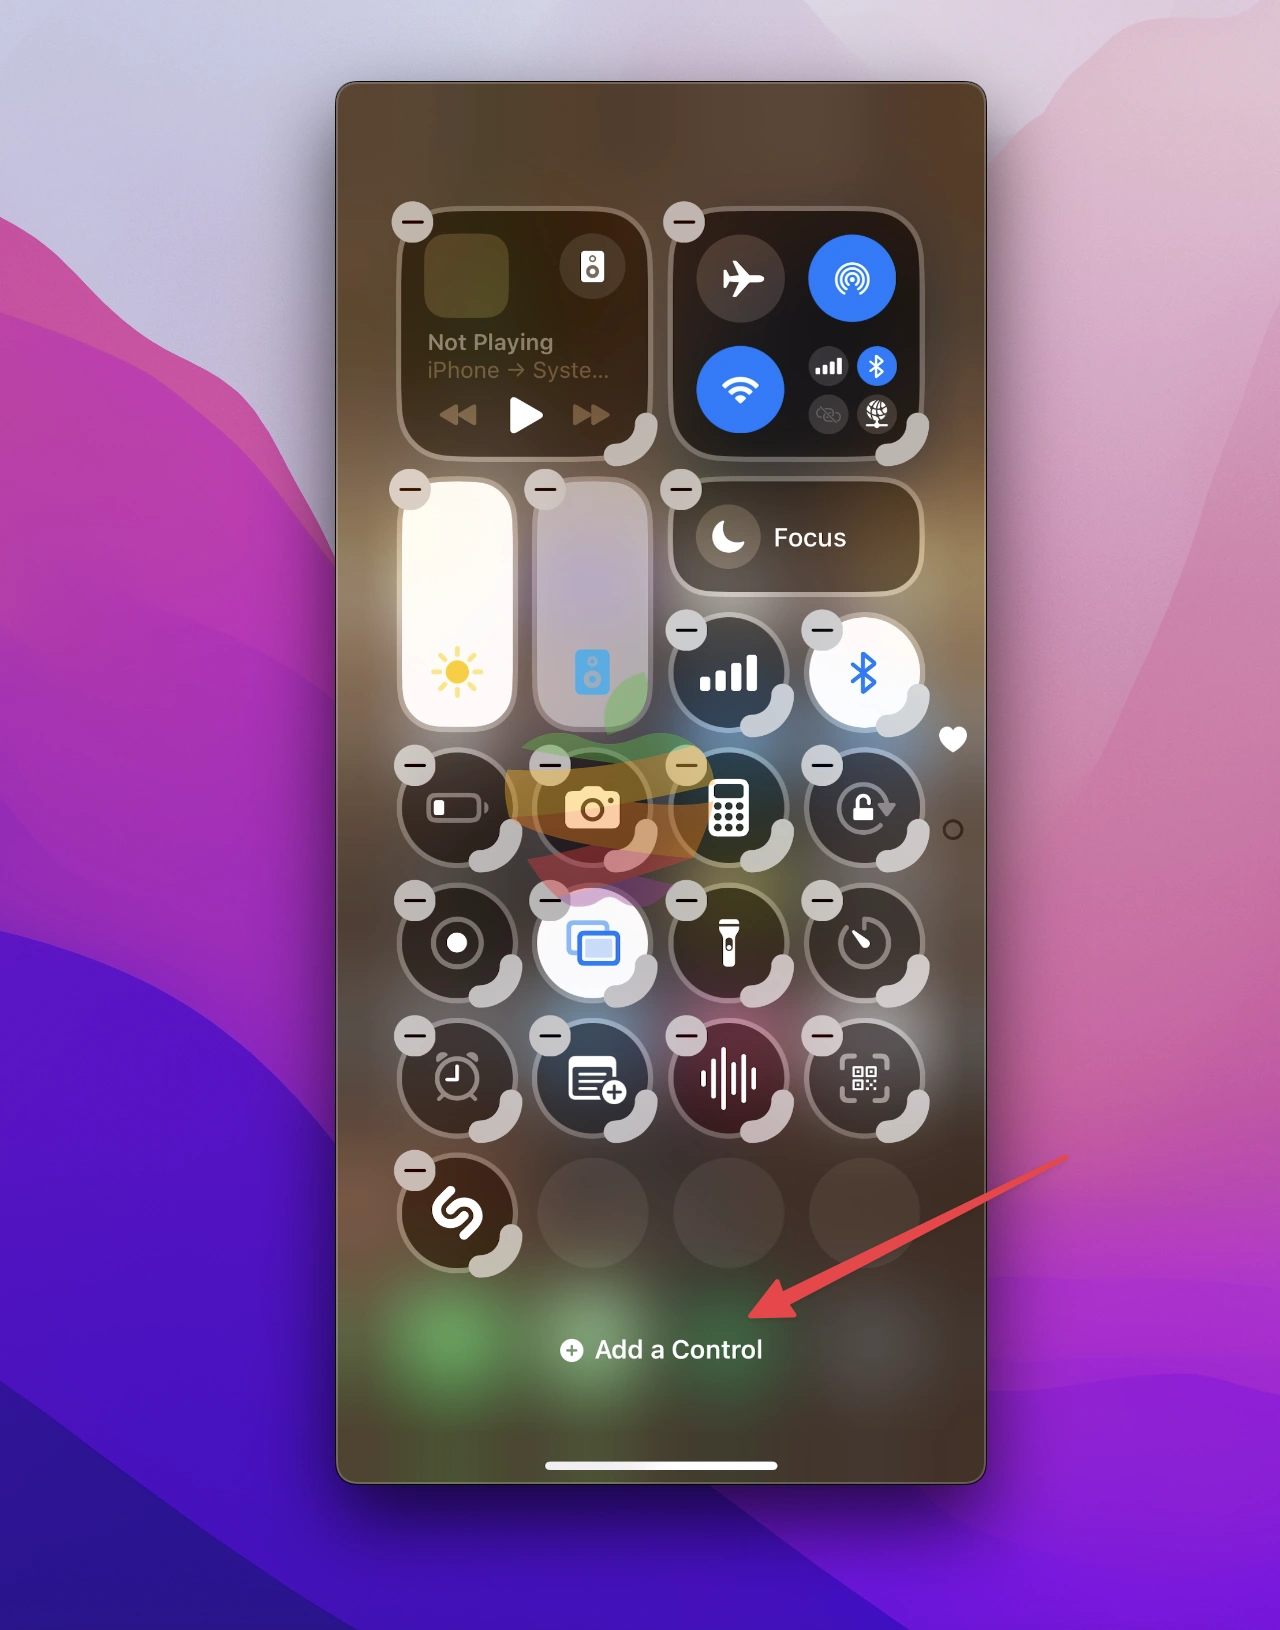
Then select the Screen Recording icon to add it to your Control Center.
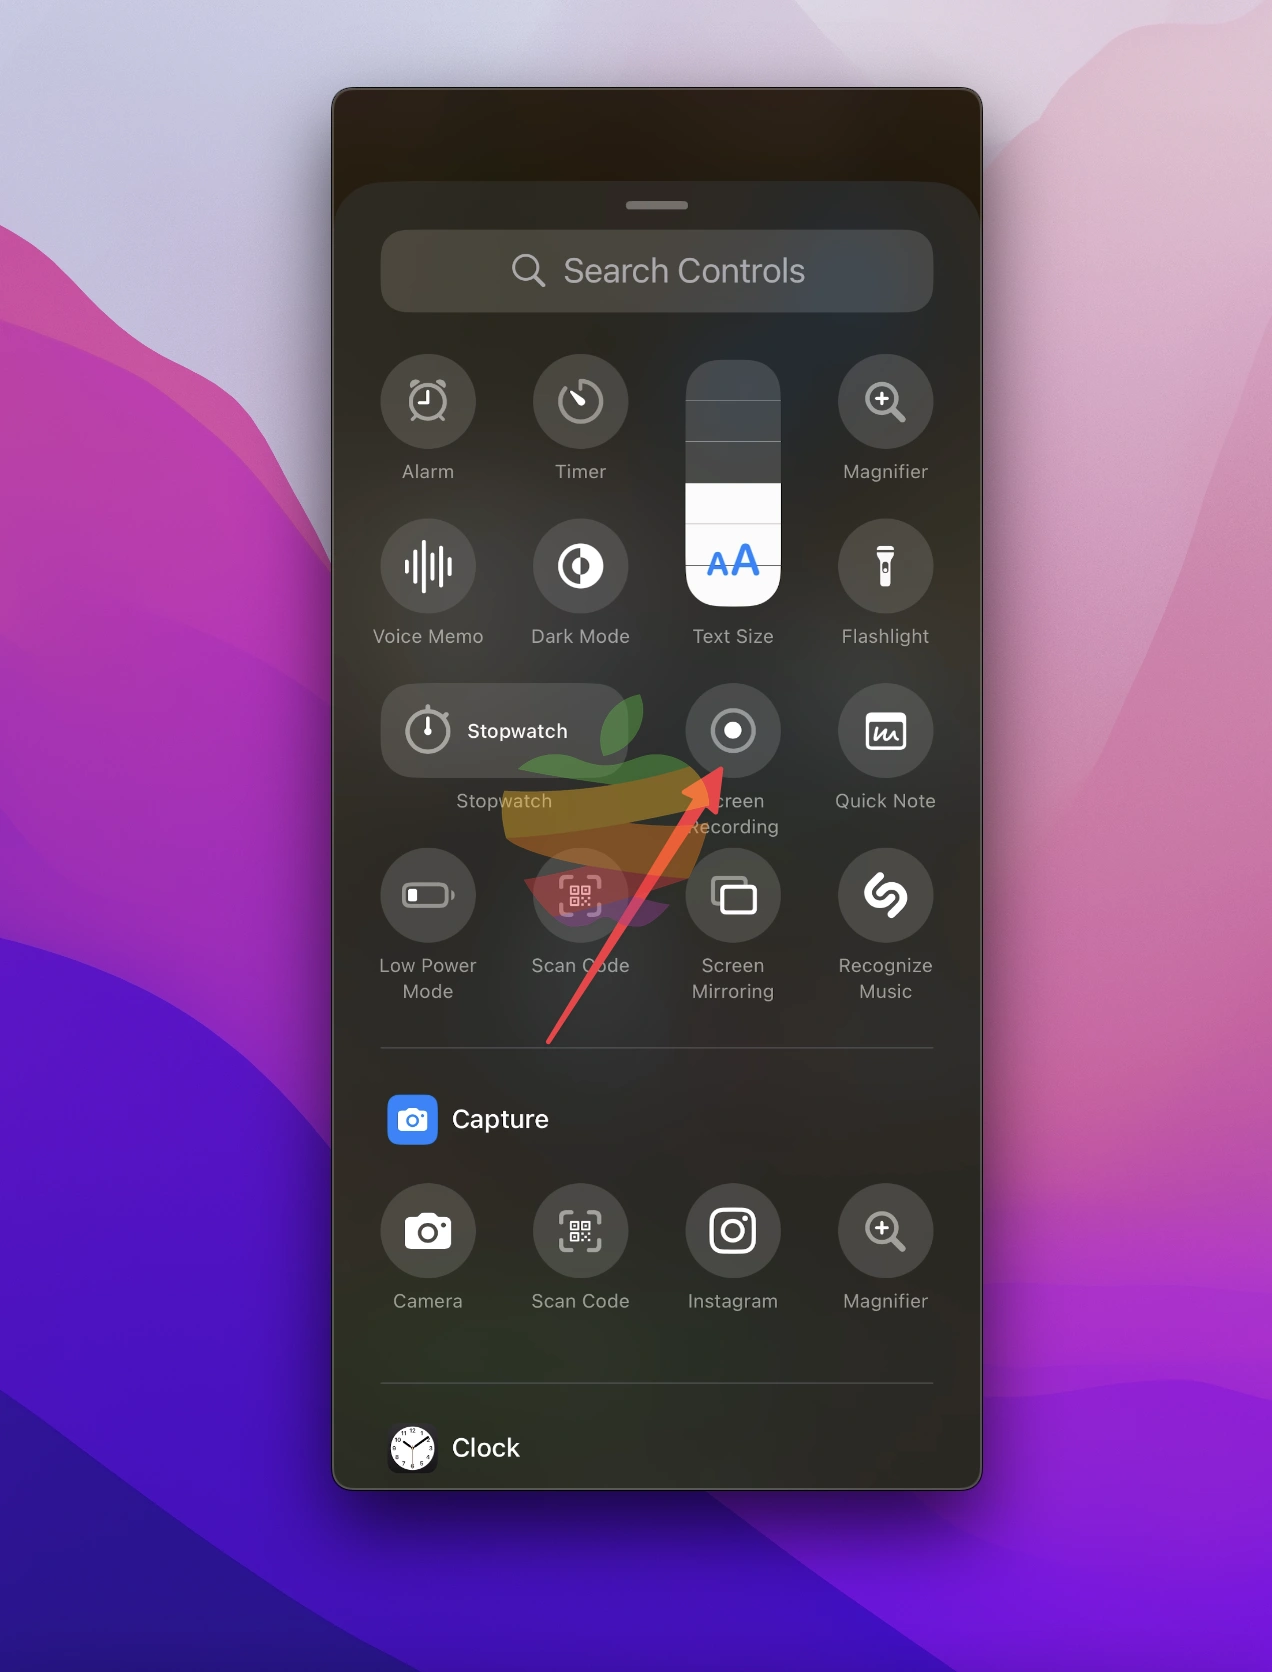
Press and drag your controls to rearrange them, just like organizing apps on your home screen.
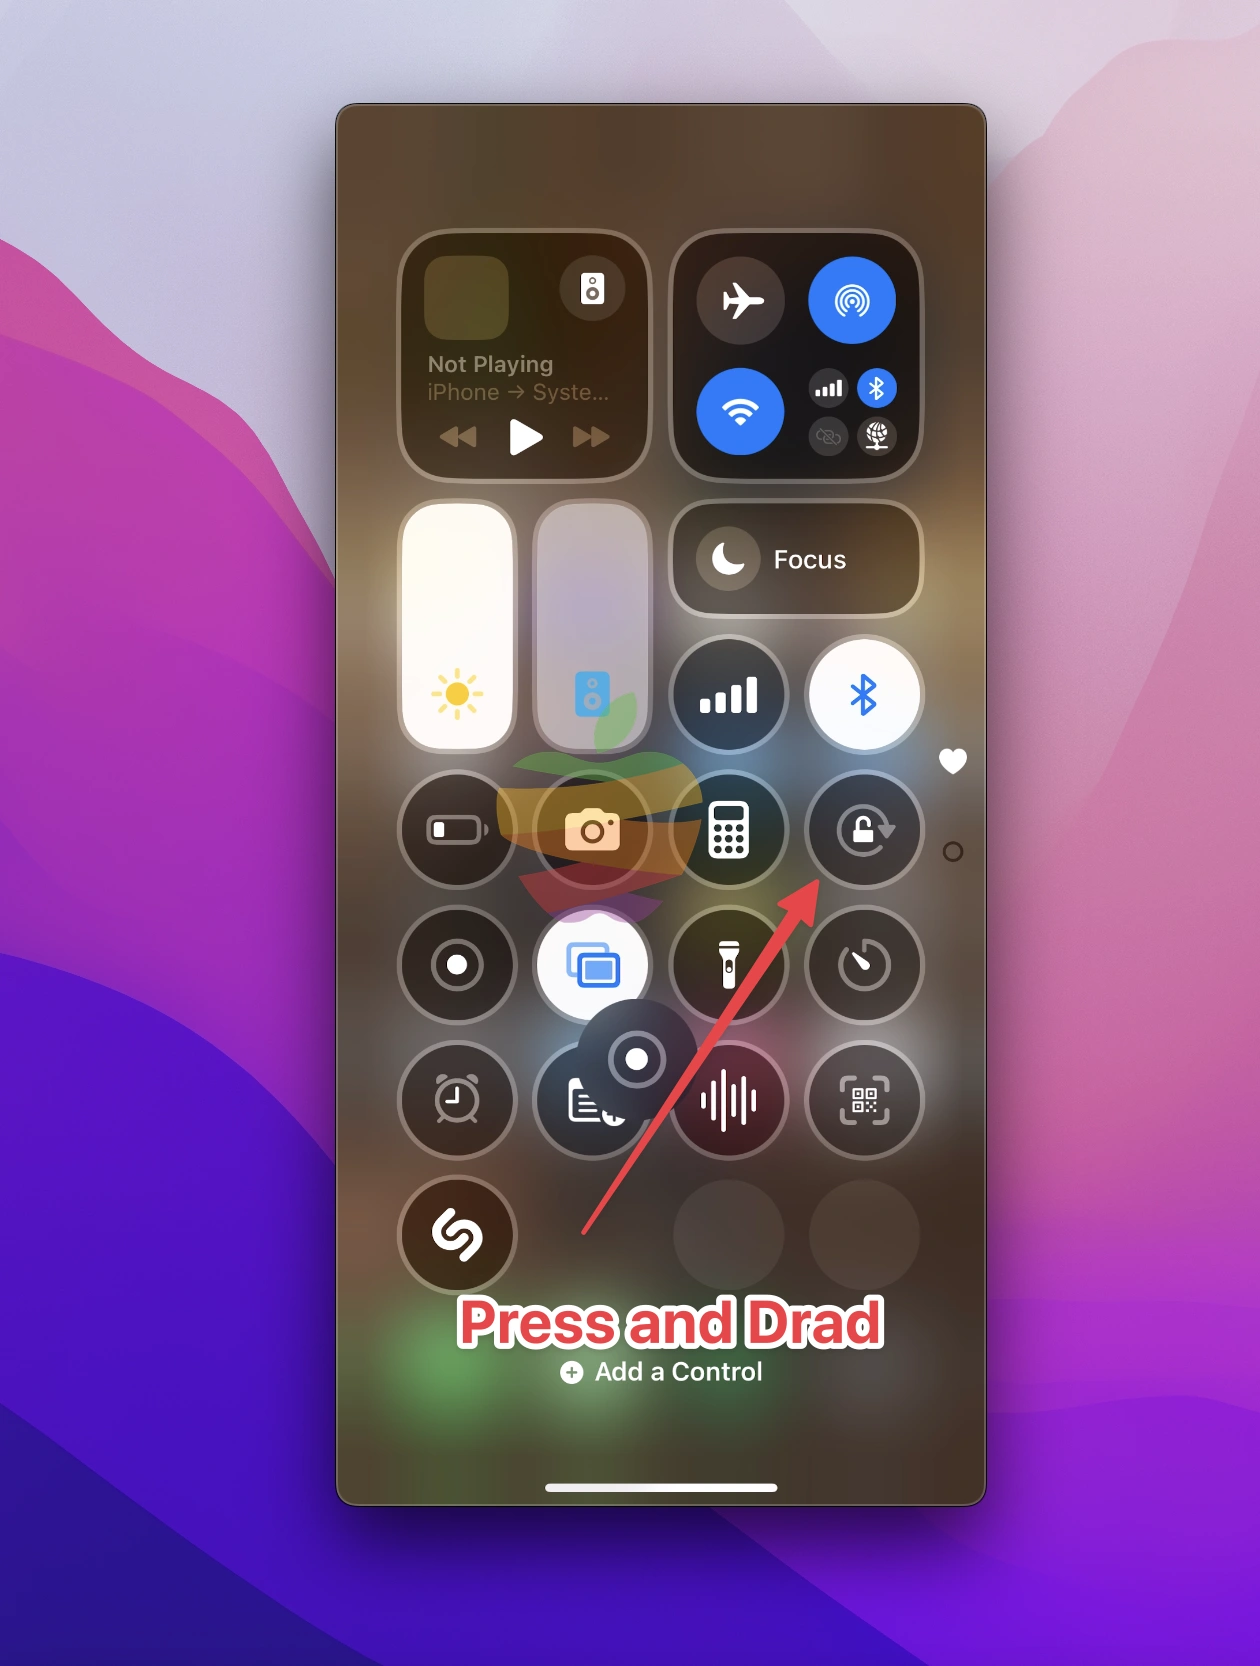
To remove it, just tap on the (-) button.
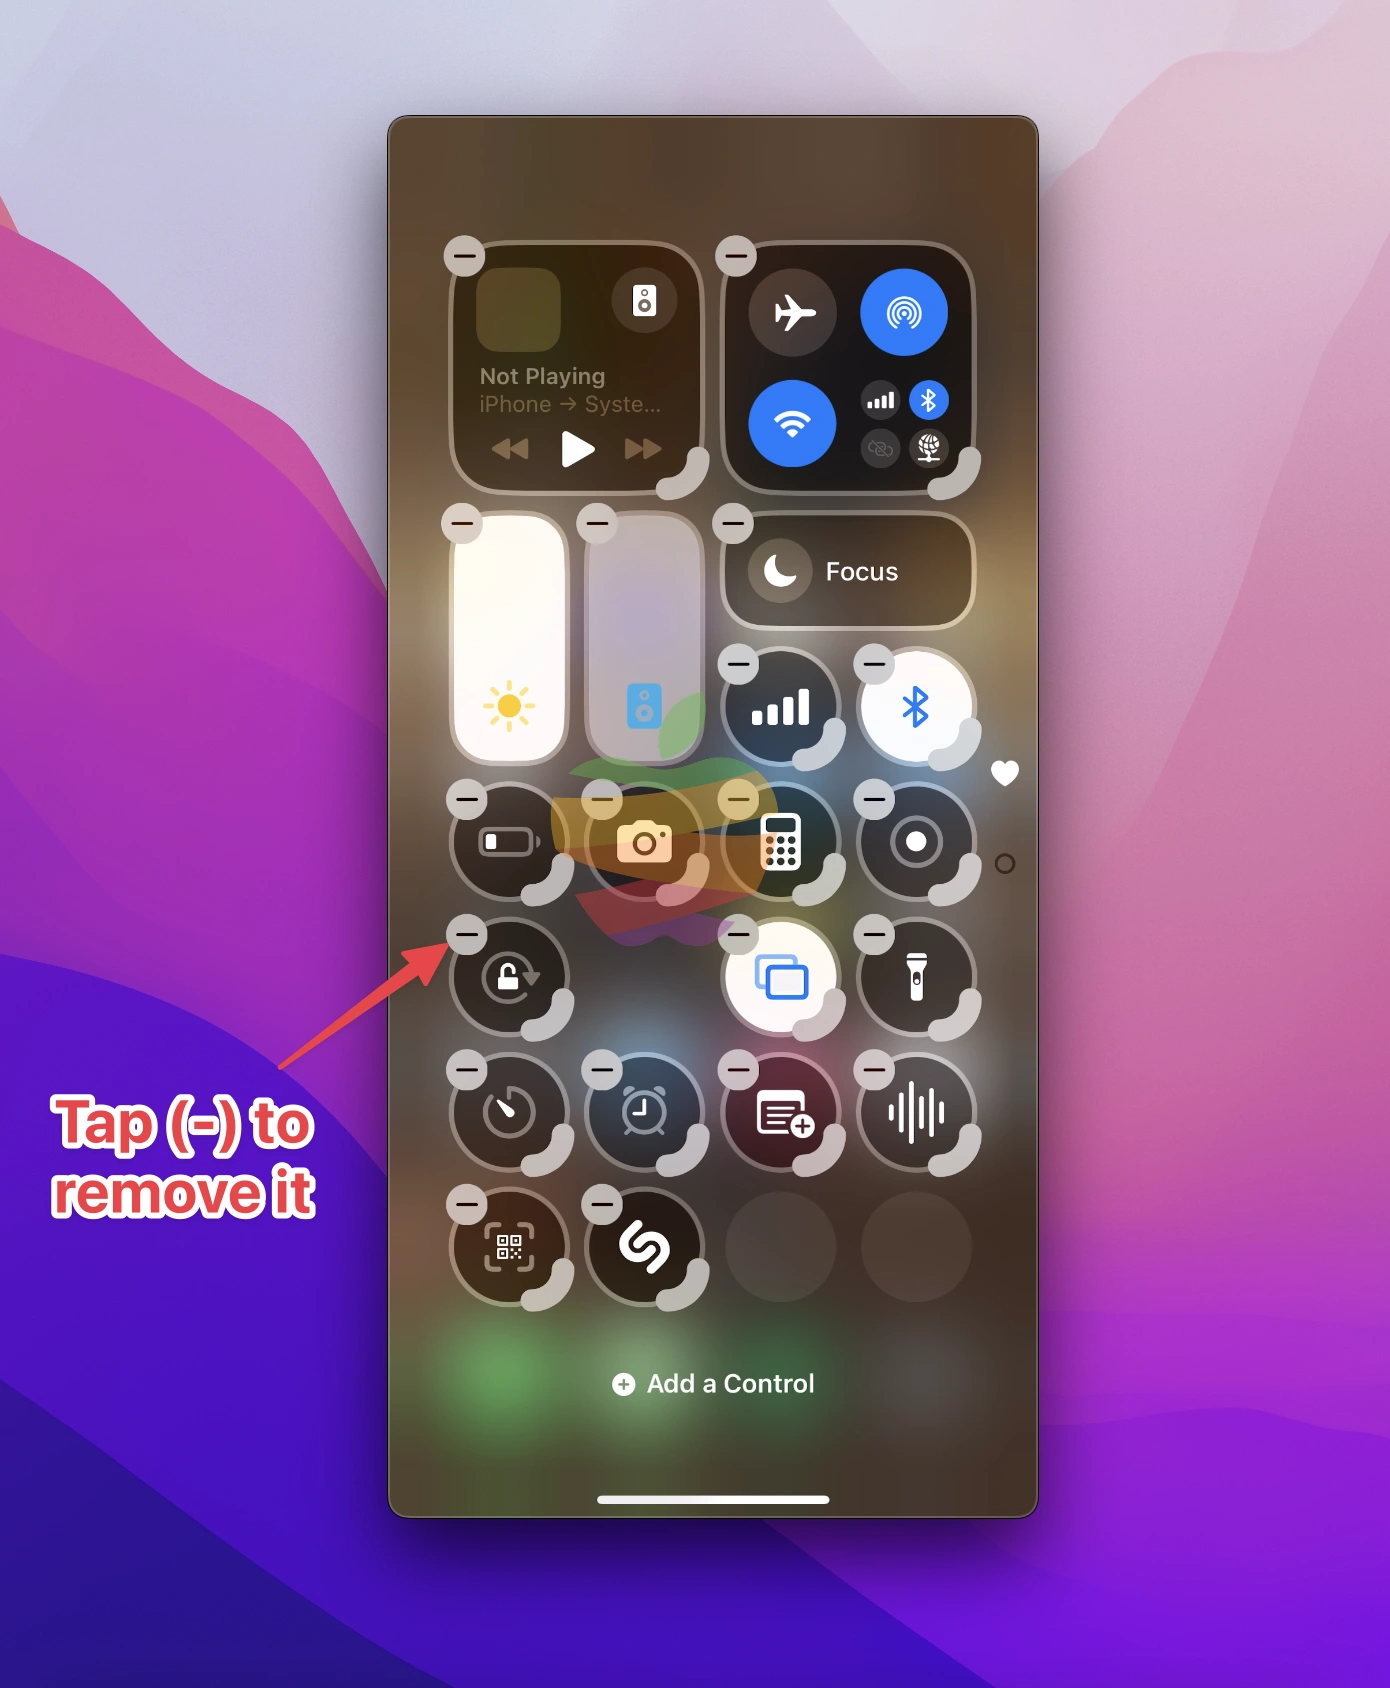
4. Now, simply swipe up from the bottom to finish customizing your Control Center.
How to Use
To record the screen, tap the Screen Recording icon (a solid circle within a ring). After a 3-second countdown, the recording will begin.
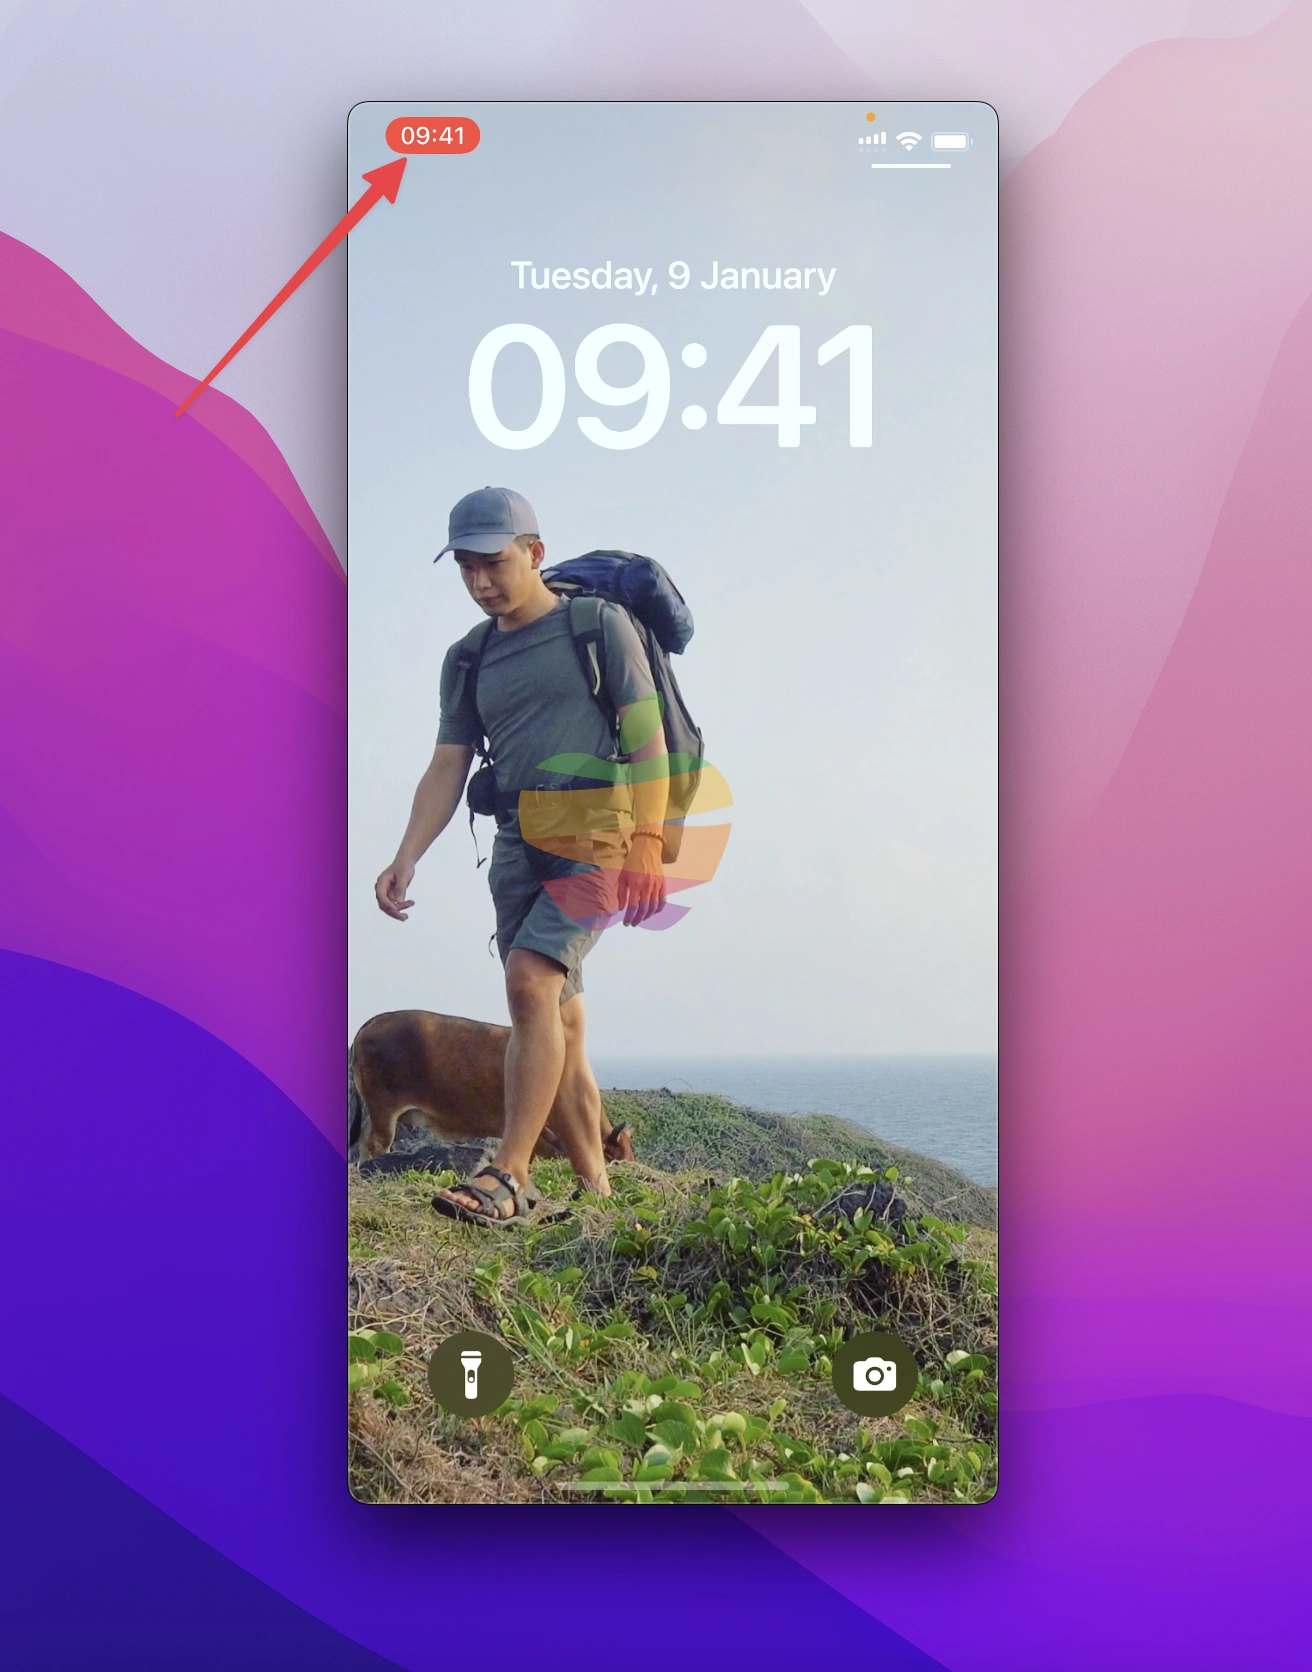
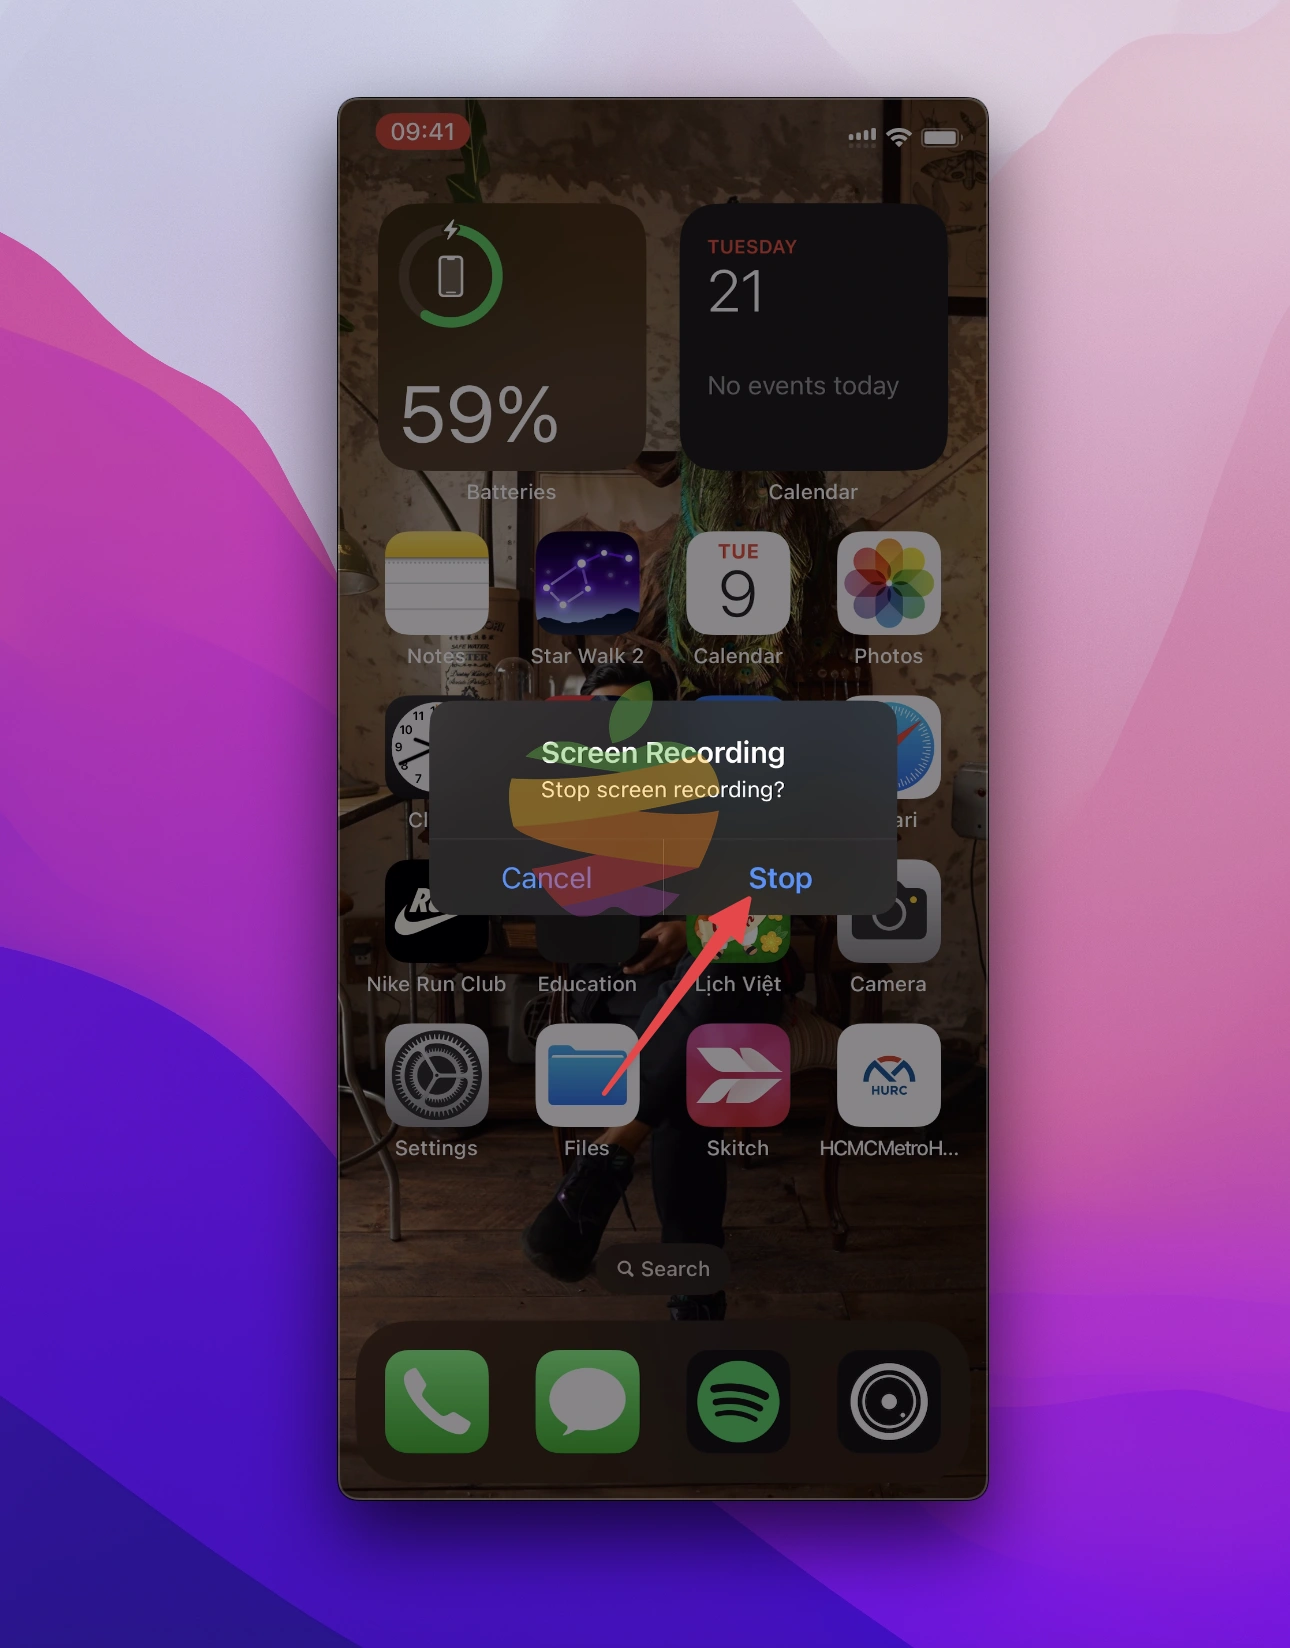
To stop recording, tap the Red Status Bar at the top of the screen and select Stop. Your video will automatically save to the Photos app.
How to Record the Screen With Sound
To record your iPhone screen with audio, start by opening the Control Center. Press and hold the “Screen Recording” button until additional options appear.
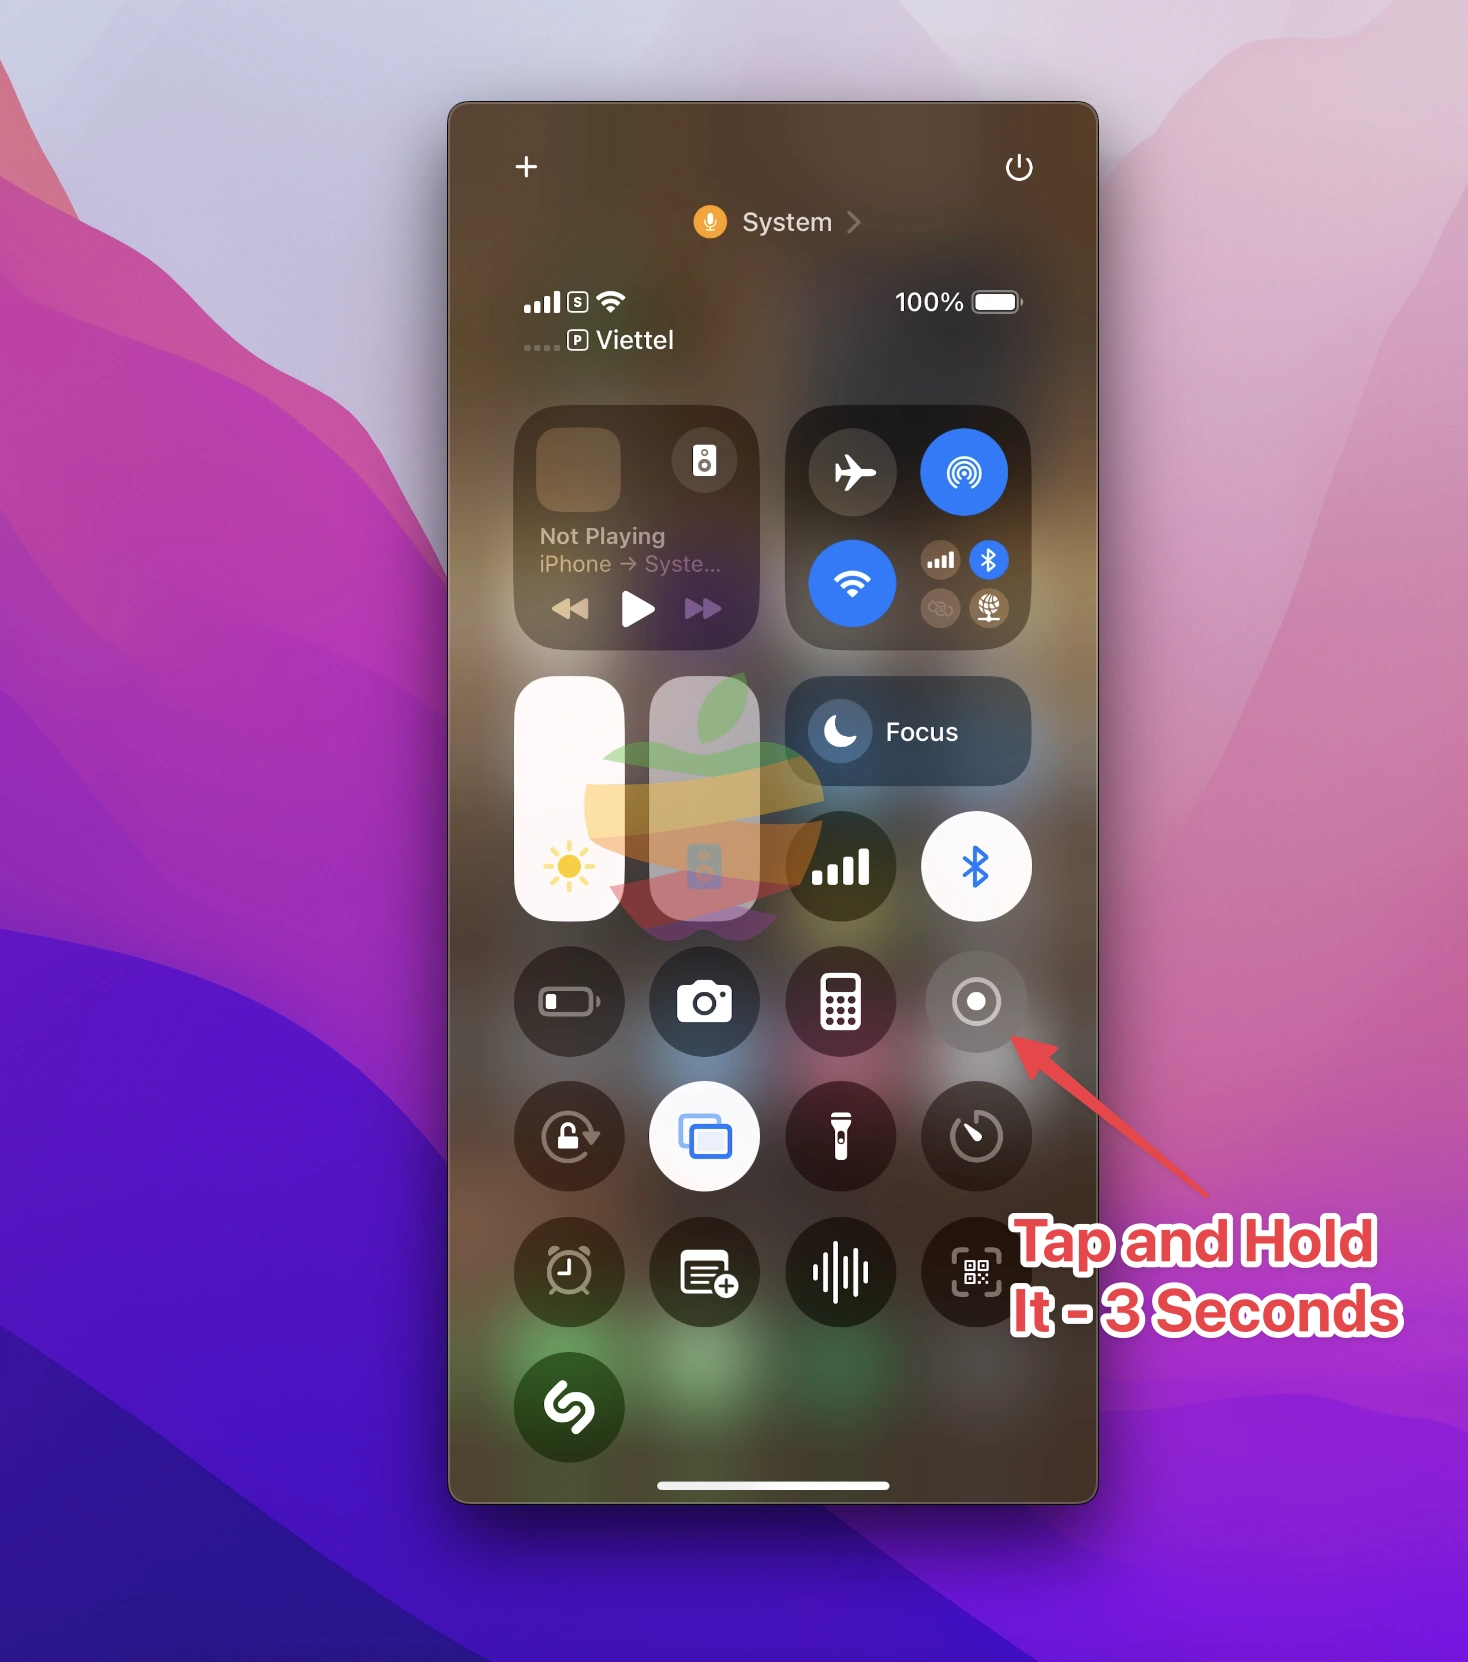
Then, tap the “Microphone” option to enable it.
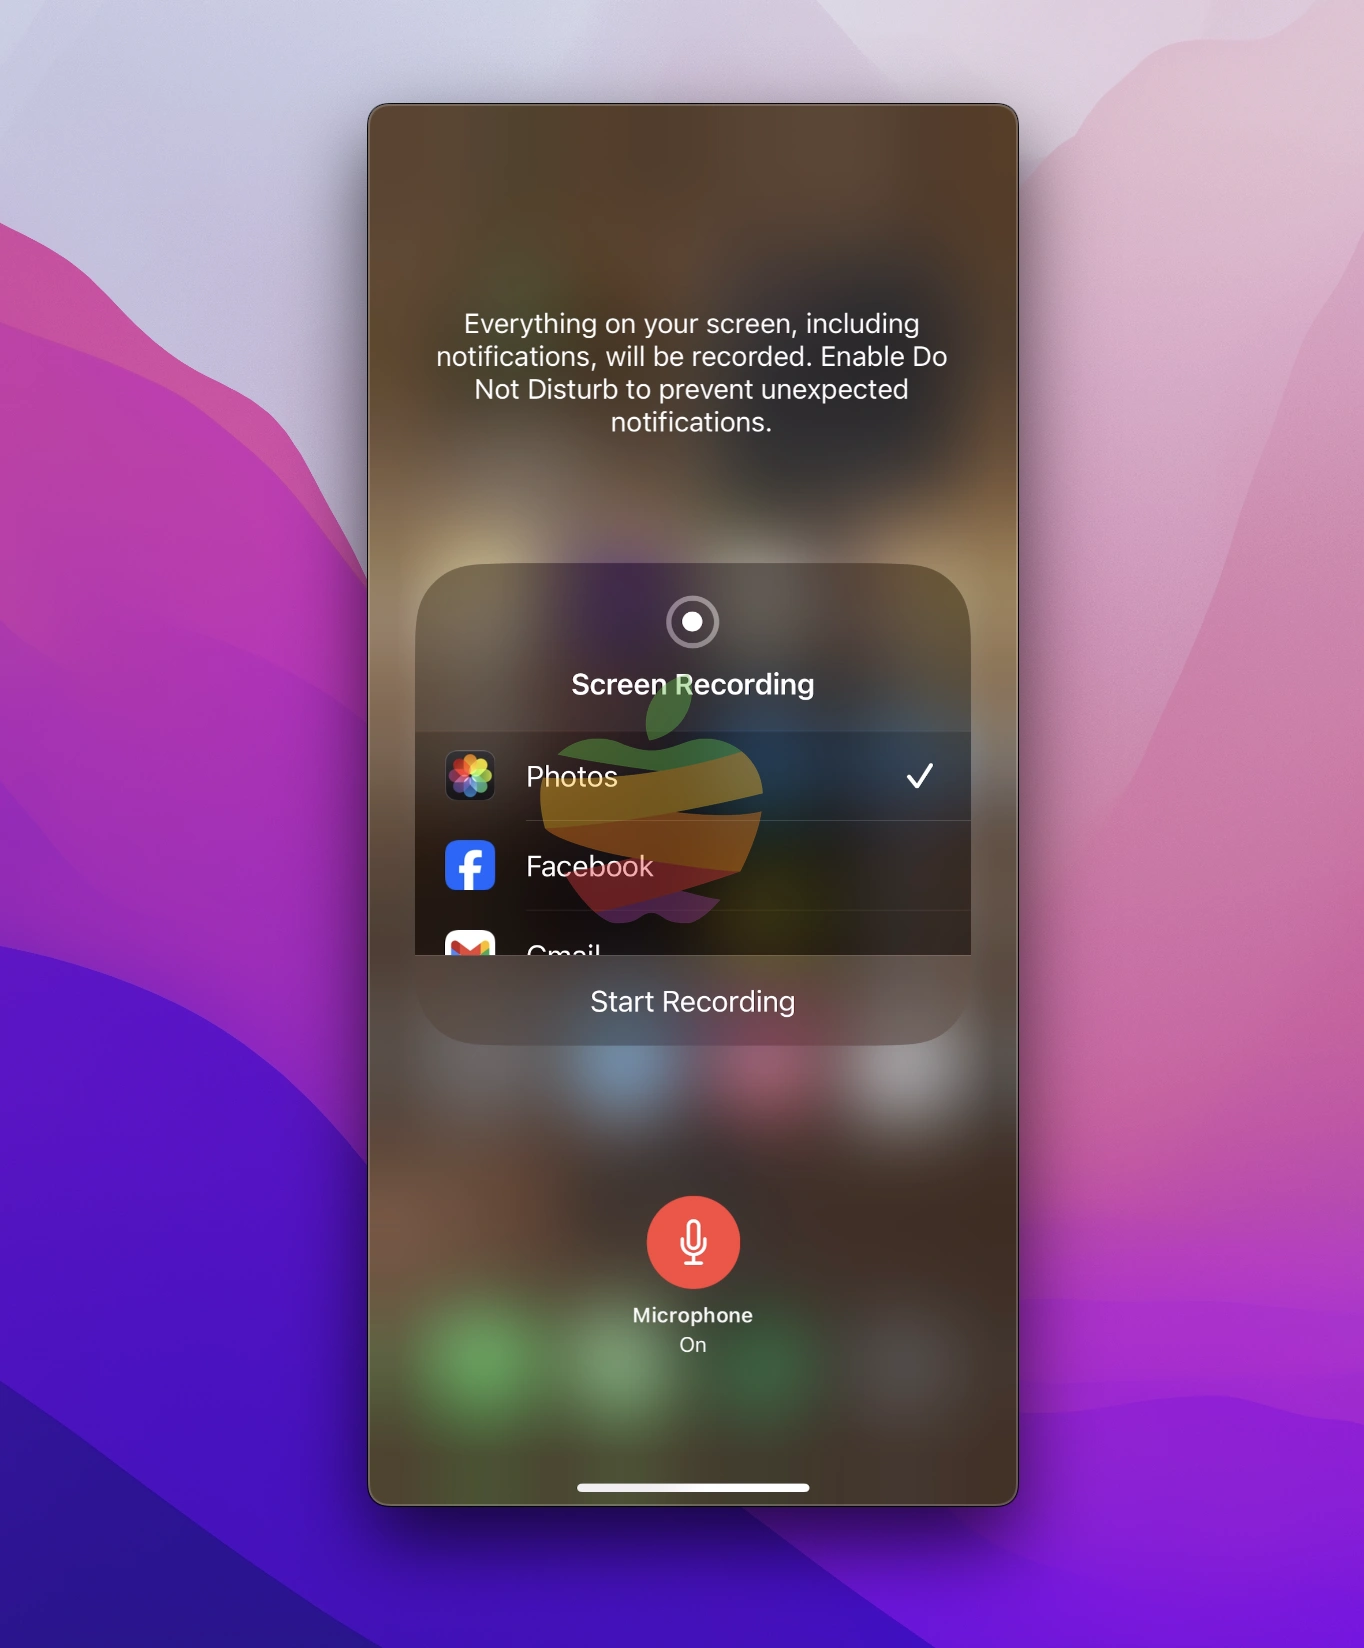
Once activated, your iPhone will record your screen activity and audio, including your voice.
Using QuickTime on Mac
QuickTime on Mac is a versatile tool that supports screen recording on your Mac and enables you to record your iPhone screen seamlessly. Here’s a simple guide to help you get started.
Step 1: Connect your iPhone to your Mac using a Lightning or a Type-C (iPhone 15 and later models) cable.
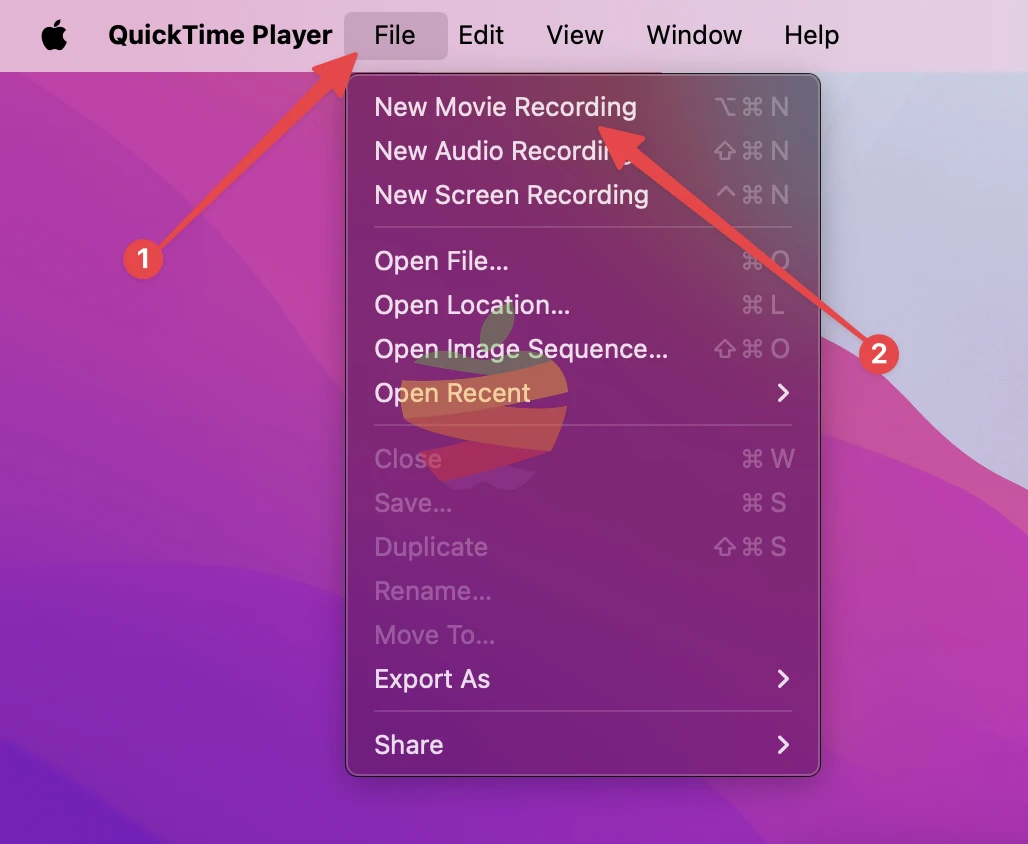
Step 2: Open QuickTime Player on your Mac. Go to File > New Movie Recording.
Step 3: Click the dropdown arrow next to the record button in QuickTime.
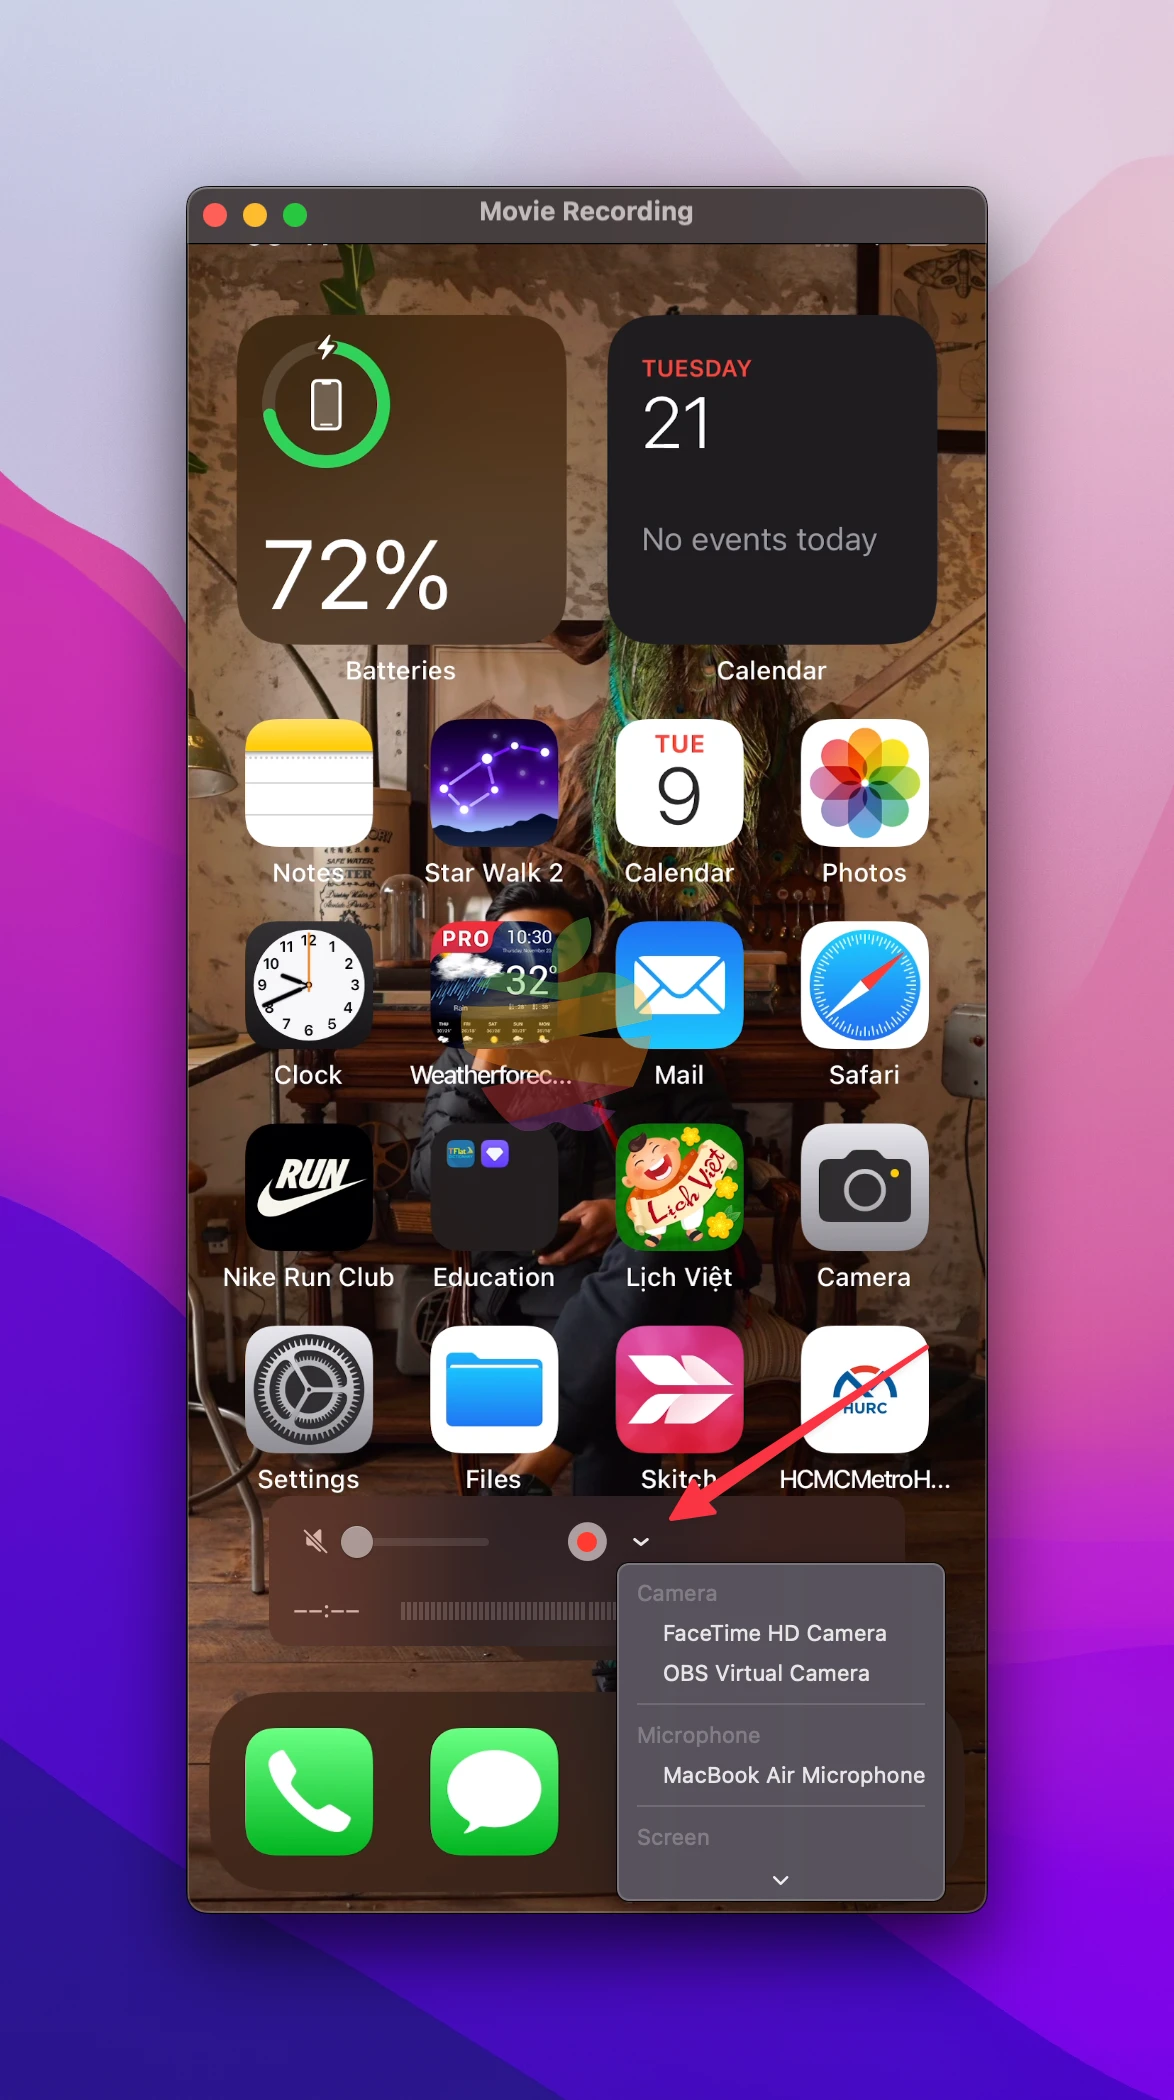
From the menu, select your iPhone’s name as the Camera and Microphone source.
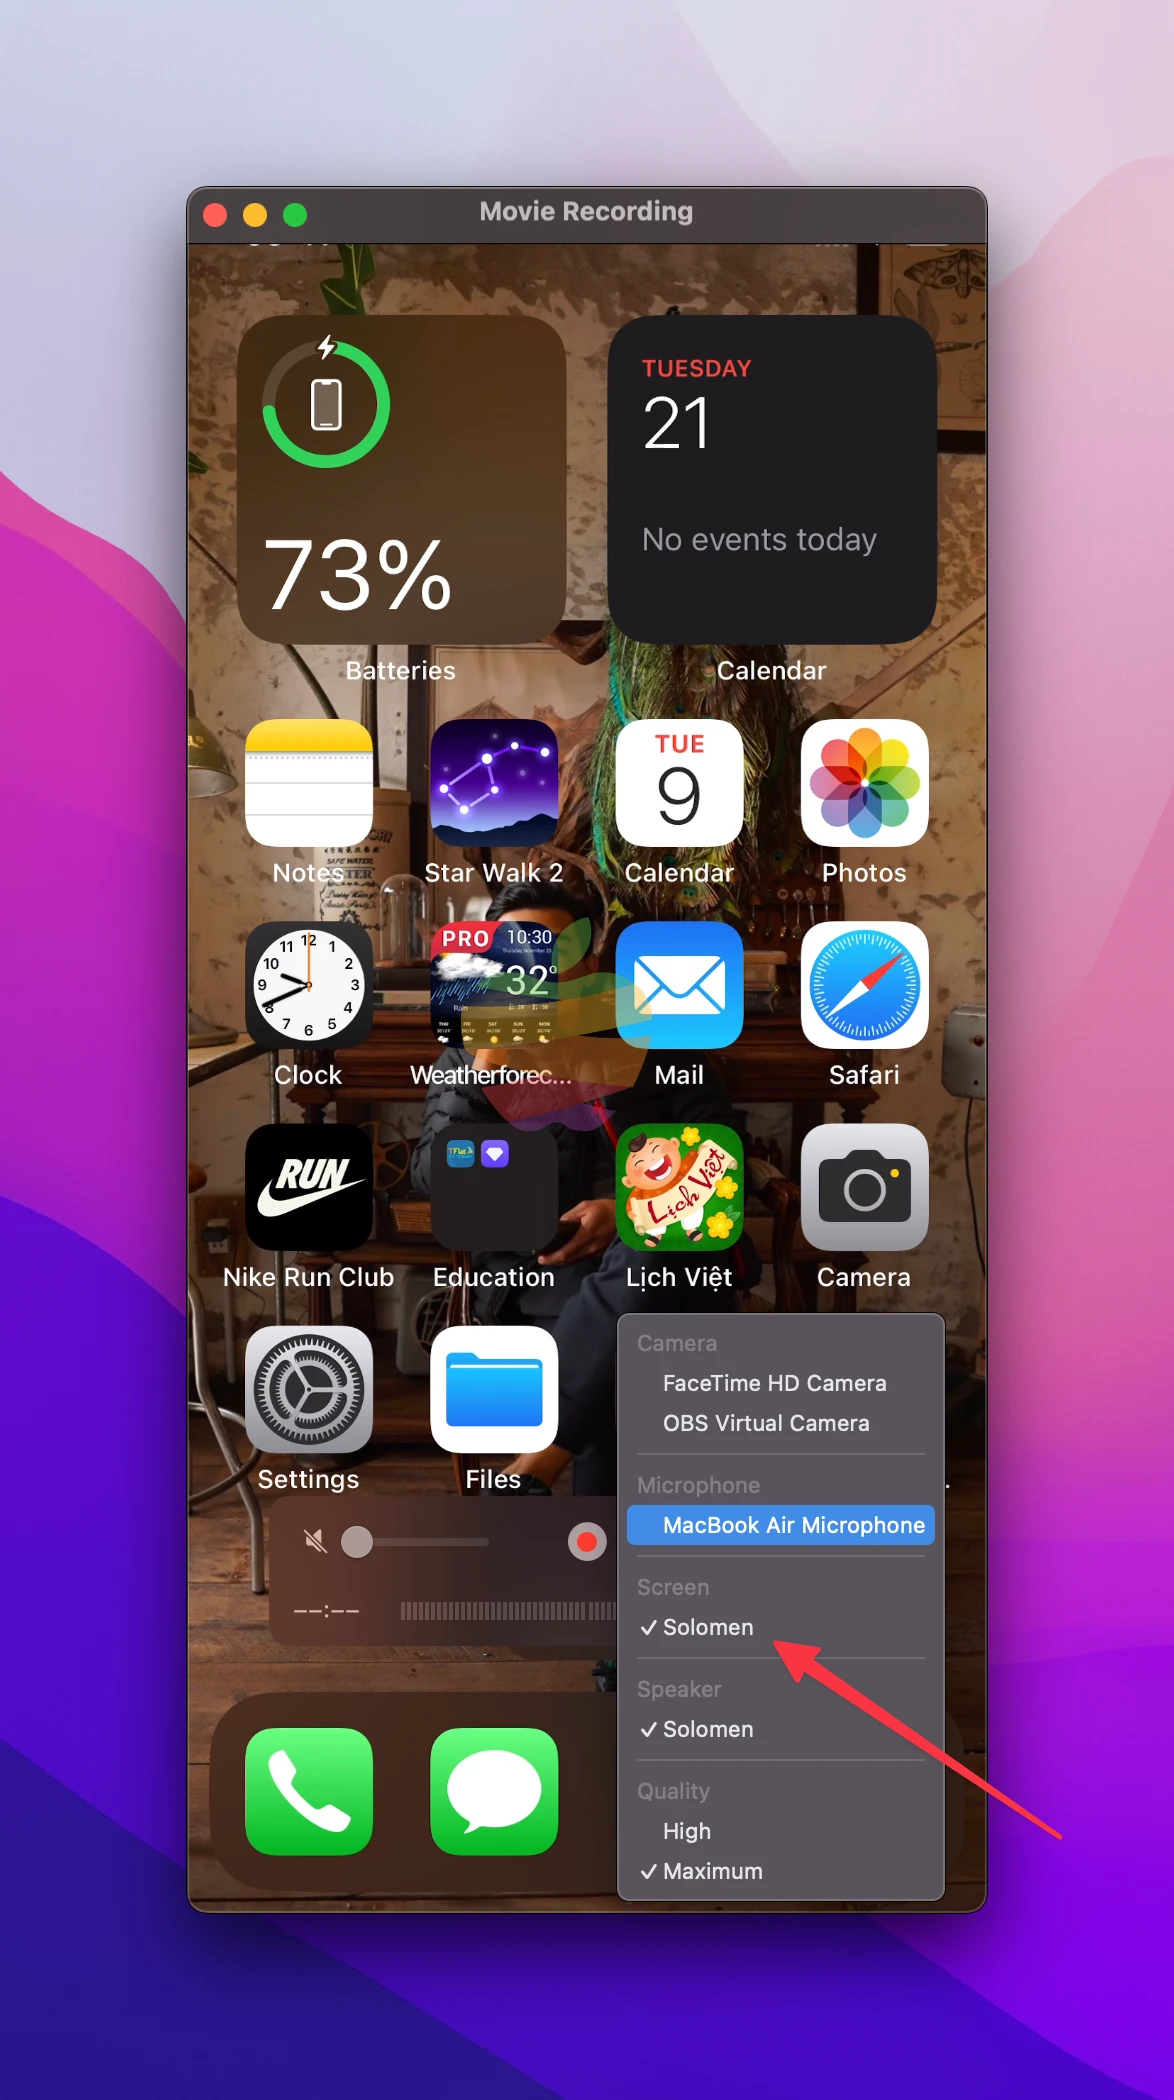
Step 4: Click the Red Record button to record your iPhone screen. Perform the actions on your iPhone as needed.
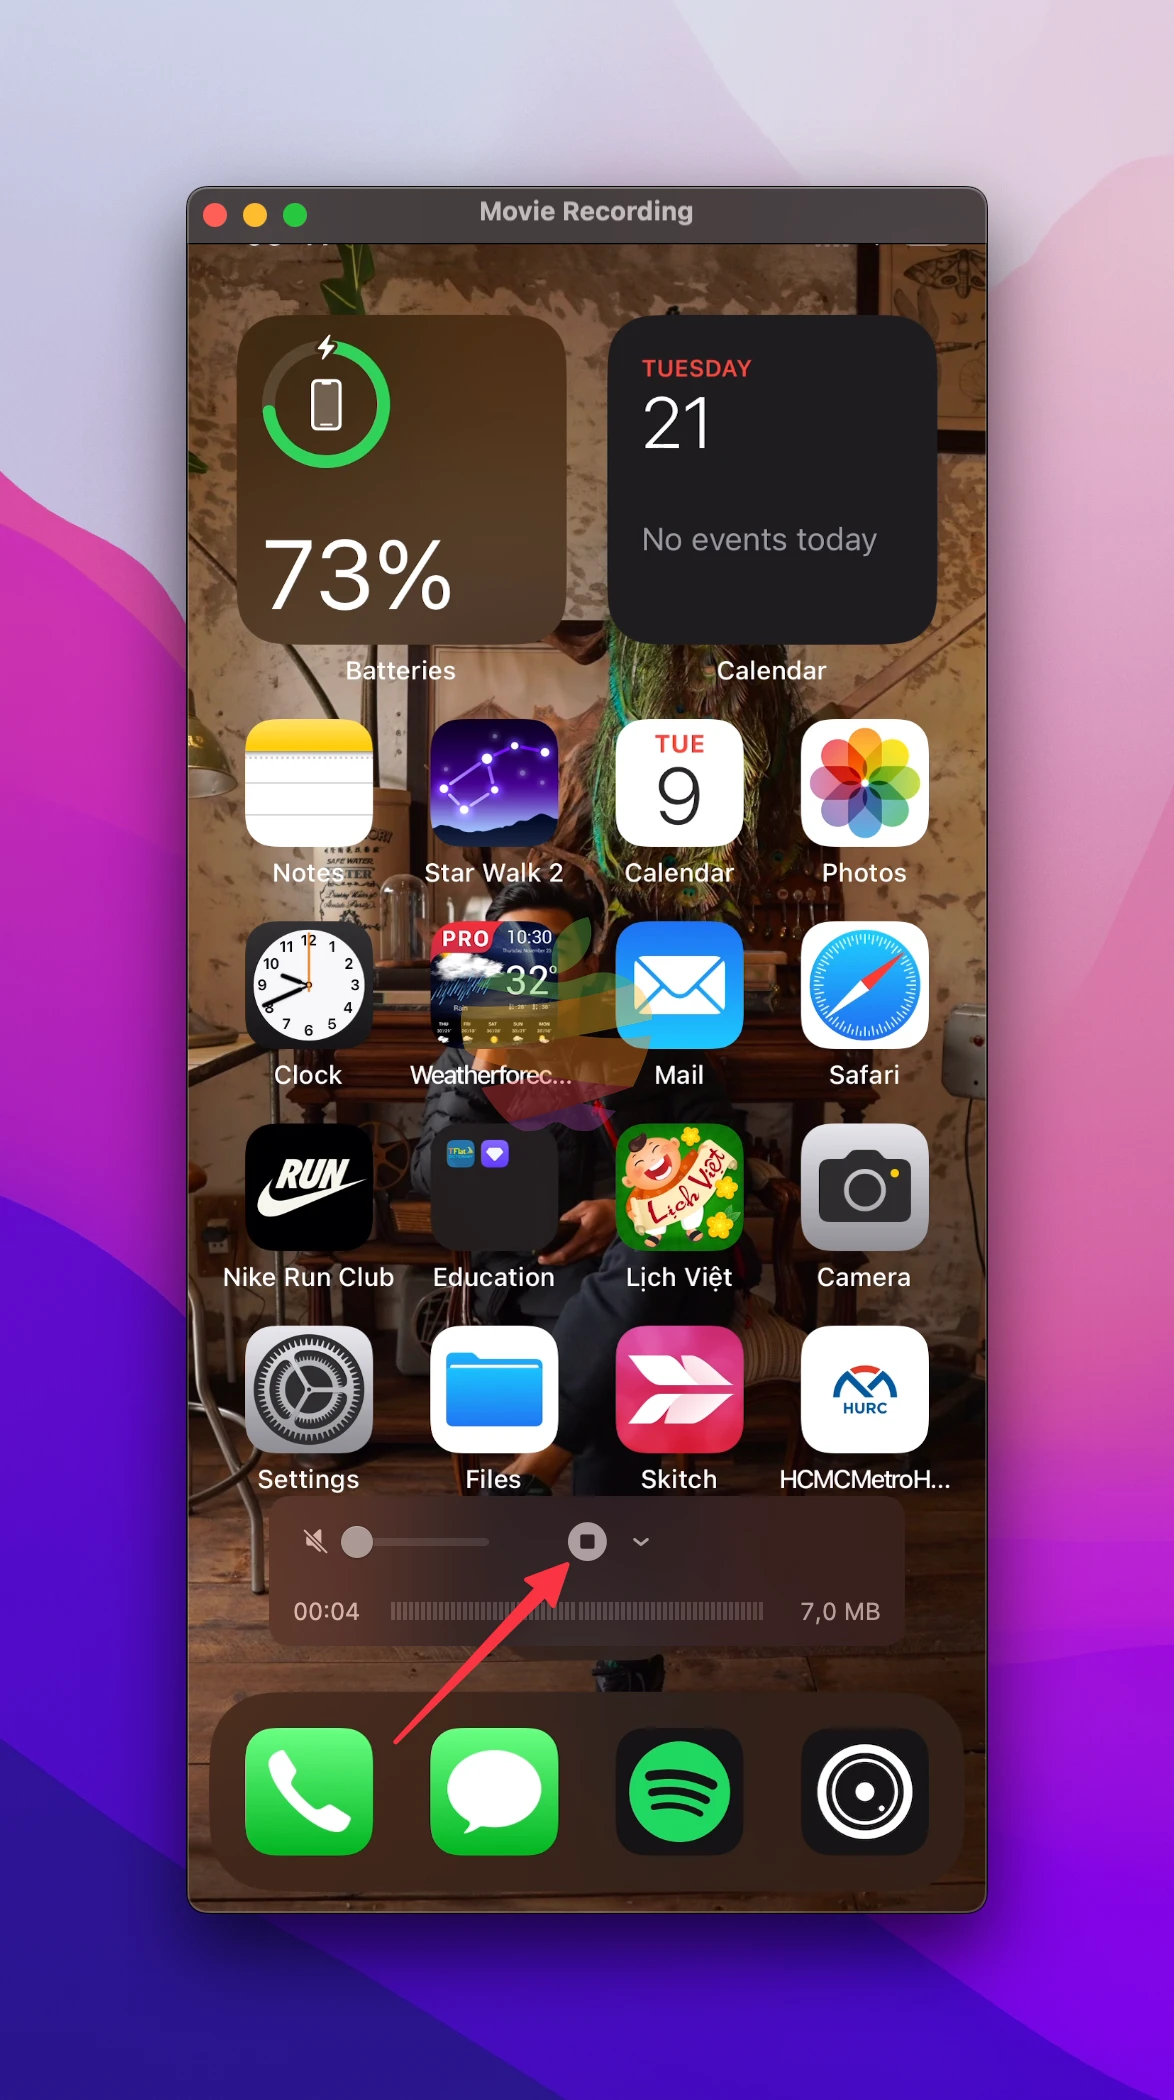
Step 5: When done, click the Stop button, then save the recording to your desired location.
Recording an iPhone With a Camera
Recording your iPhone screen with a camera is a fantastic option for high-quality video. However, this method can be pretty expensive, as it requires investing in equipment like a camera, tripod, memory cards, and other accessories.
I currently own a Sony camera, and below are some basic steps to record videos using this camera that you can follow.
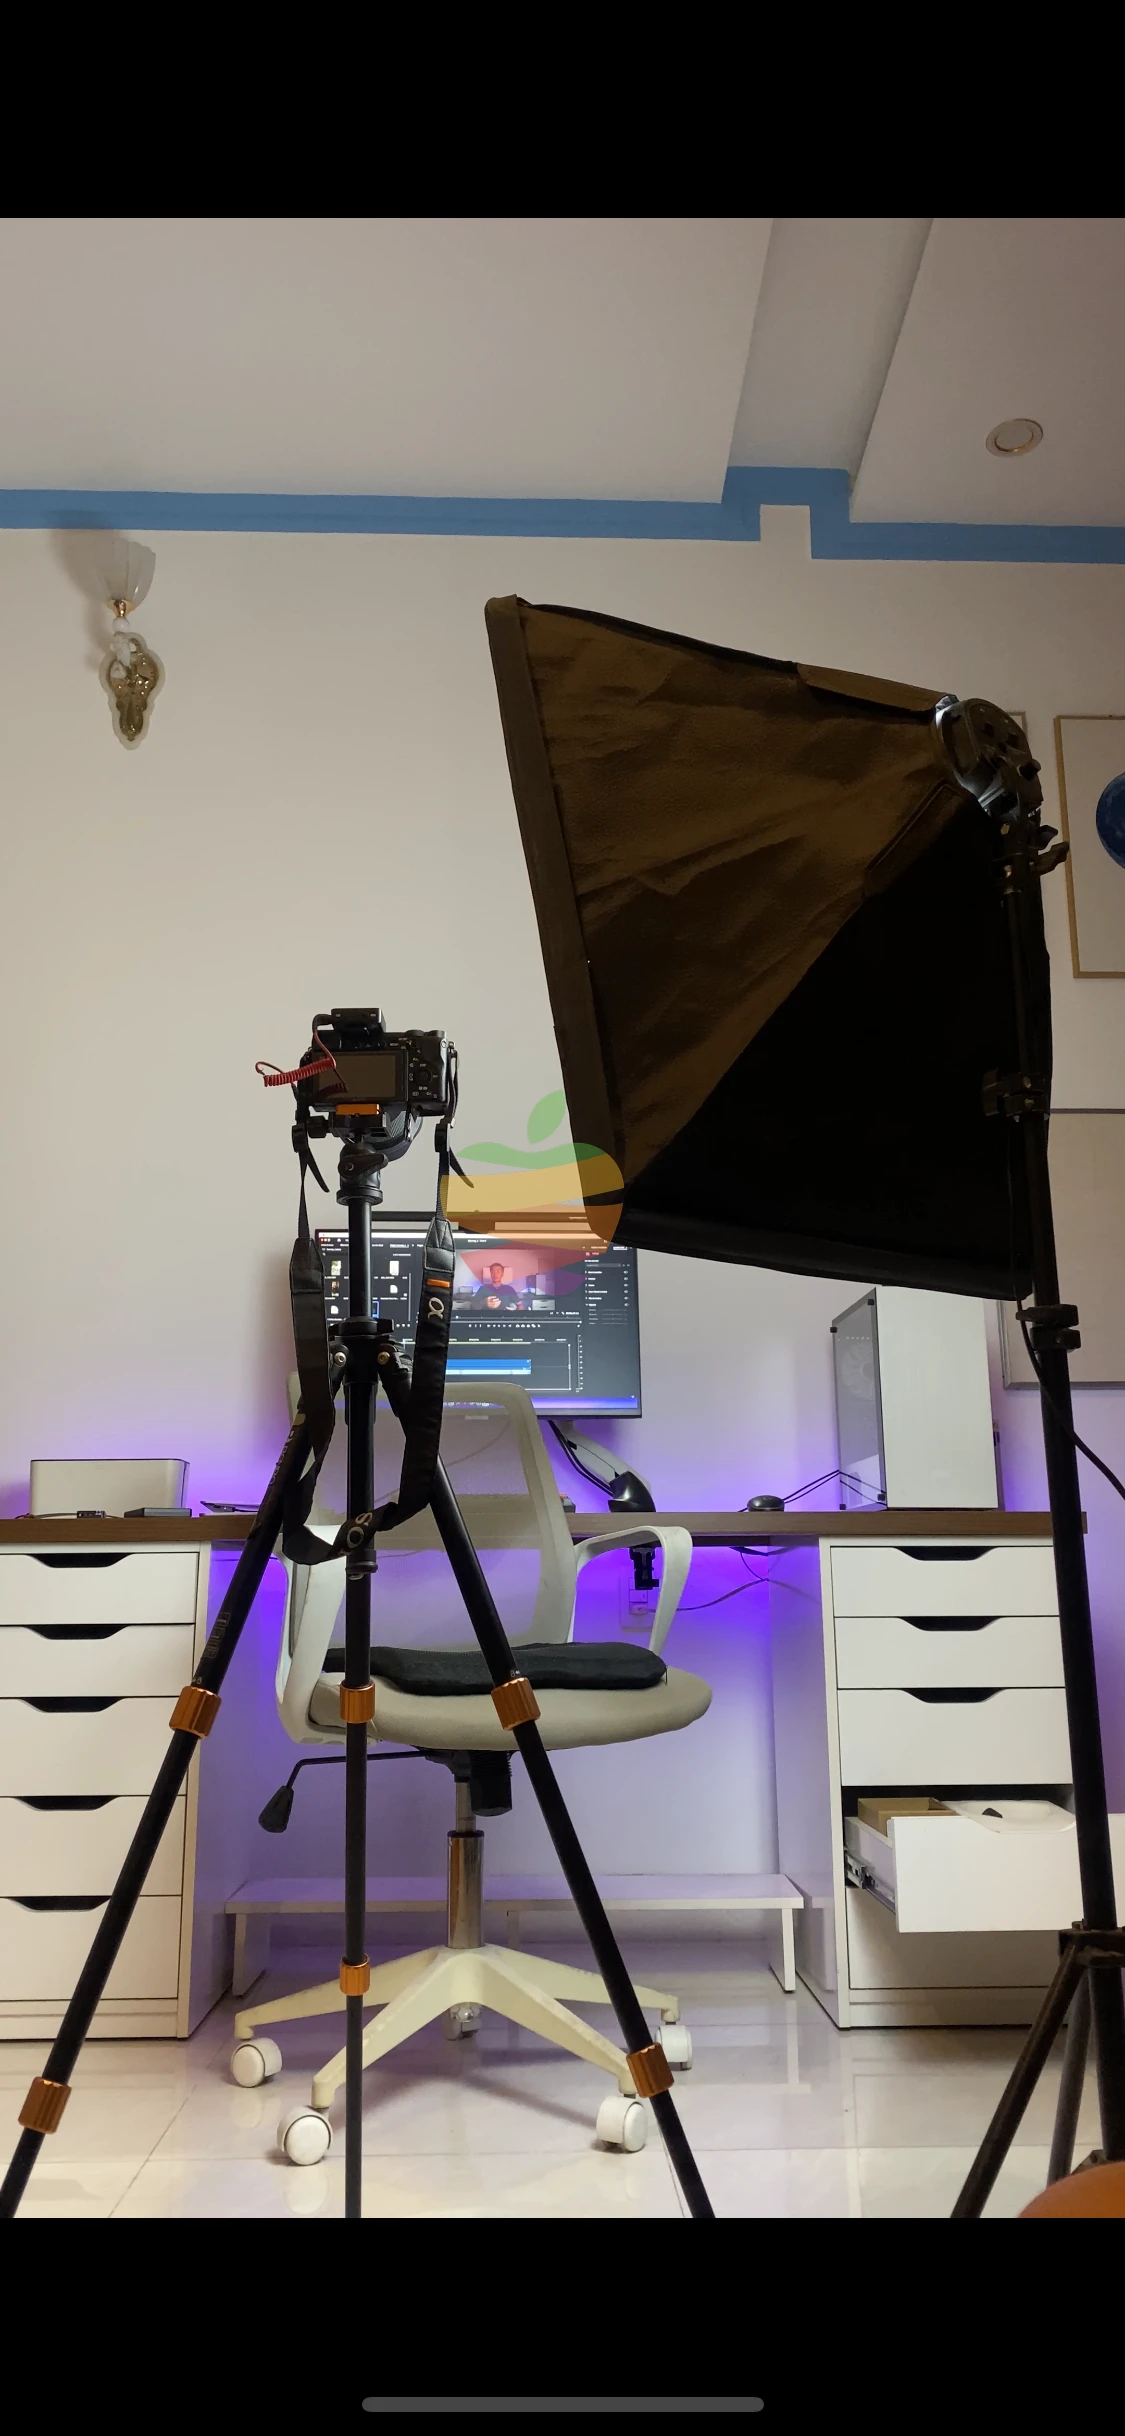
Step 1: Set up a tripod for your camera to ensure a steady recording.
Step 2: Position your iPhone on a flat surface with the screen visible and adjust the camera angle for precise focus.
Step 3: Adjust your camera’s settings to optimize video quality. You will need to learn more about aperture, shutter speed, ISO, and exposure.
Step 4: Start recording on the camera and perform the actions on your iPhone screen as needed.


